![]() In the third tutorial of the interactive FDTD toolbox we will simulate the light propagation inside a photonic crystal. We will see that it will be very intuitive to understand the reflection at a defect and the use of a photonic crystal as beam splitter.
In the third tutorial of the interactive FDTD toolbox we will simulate the light propagation inside a photonic crystal. We will see that it will be very intuitive to understand the reflection at a defect and the use of a photonic crystal as beam splitter.
Photonic crystals have drawn tremendous scientific attention since the late 80's of the last century due to their re-discovery by Yablonovitch and John in 1987 (both PRL 58, different issues). A photonic crystal is a periodic structure that can be used to change the propagation behavior of light dramatically. But let's not go into too much detail about them now since this would require some quite decent amount of work - let's try to find out what they do with the interactive FDTD toolbox (iFDTD)!
Reflection at a Defect
Let us first consider the reflection of a guided mode at a defect inside a photonic crystal. As you have seen in the first two tutorials (1 & 2), we have to start the iFDTD inside MATLAB with the command "interactiveFDTD". A dialogue pops up where we now define the general simulation parameters:
Now we open the Define Refractive Index Profile dialogue and set up the photonic crystal. Note that one should think about the physical behavior a little before this step to actually see a working photonic crystal. If the parameters are not chosen in a reasonable manner, we will just observe a lot of scattering inside the structure. However, the following parameters work just fine:
Now we have to define the actual waveguide in the photonic crystal - the places where the structure is left out. We open Define Refractive Index Profile two times to cut out some parts of the photonic crystal and to generate the following structure:
You can see the "defect" in the middle. Now we place the gaussian shaped source in the waveguide:
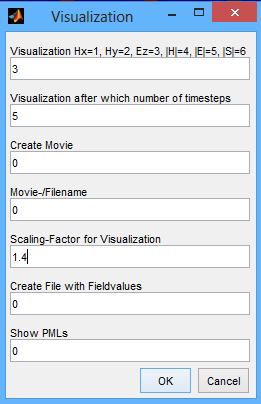
To start the simulation, please click on Start Simulation and set the visualization parameters:
A new window opens and we can observe the field evolution:
We clearly see the propagation in the photonic crystal waveguide until the defect in the lattice appears. For comparison, a similar structure without defect is shown on top. At the defect, the propagating mode gets reflected. Since reflection is only known as a light behaviour at the boundary between two materials this is an unusual and interesting photonic crystal feature.
Photonic Crystal as a Beam Splitter
Now we want to change the structure of the photonic crystal. We want to simulate a two dimensional photonic crystal waveguide splitter. These have the ability to split the energy equally in two waveguides without reflection.
Therefore we finish the simulation and we click on Change Refractive-Index Profile and confirm the parameters until the draggable rectangle for the defect in the lattice appears. We confirm the choice and end up with the following structure:
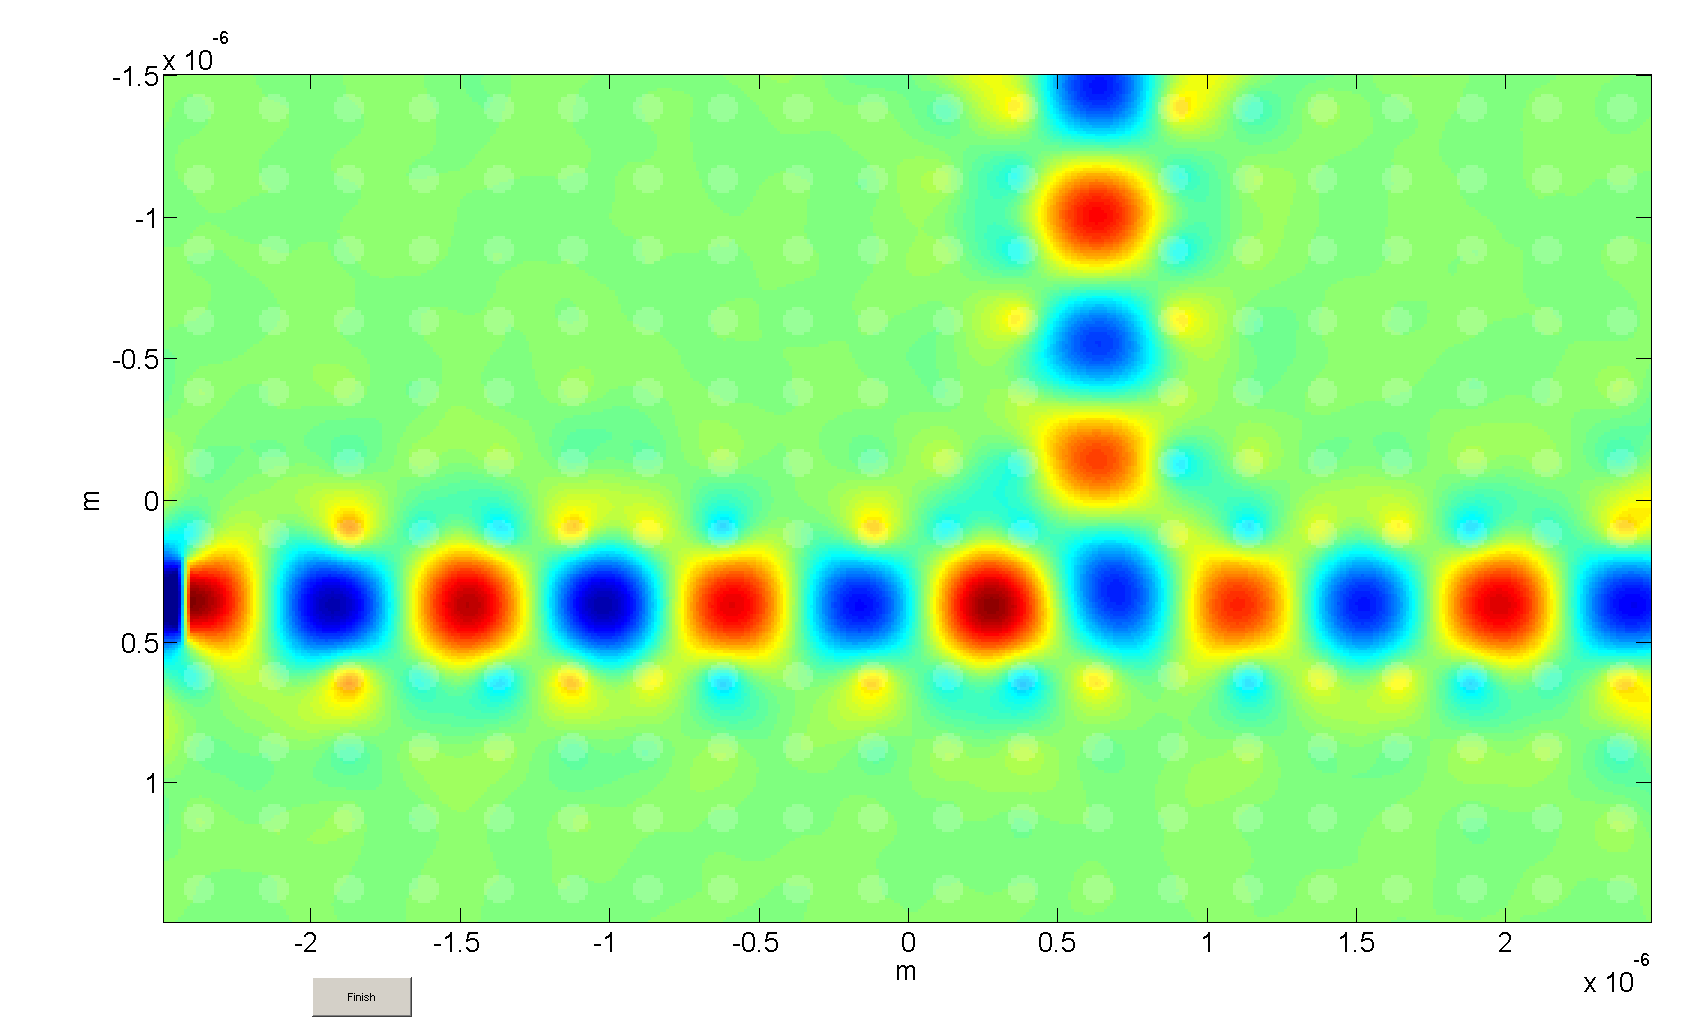
All we have to do now is to run the simulation again. In the visualization popup you may use a different scaling for visualization as we have put it to "1.4" in this case. We observe the following:
We can observe the equal splitting of the waveguide mode into the two waveguides with only minor reflection into the backward propagating mode - the photonic crystal really acts as a beam splitter!


